Showing posts with label hide tanning. Show all posts

Sunday, January 10, 2010

Tanning a Nutria - Part 2

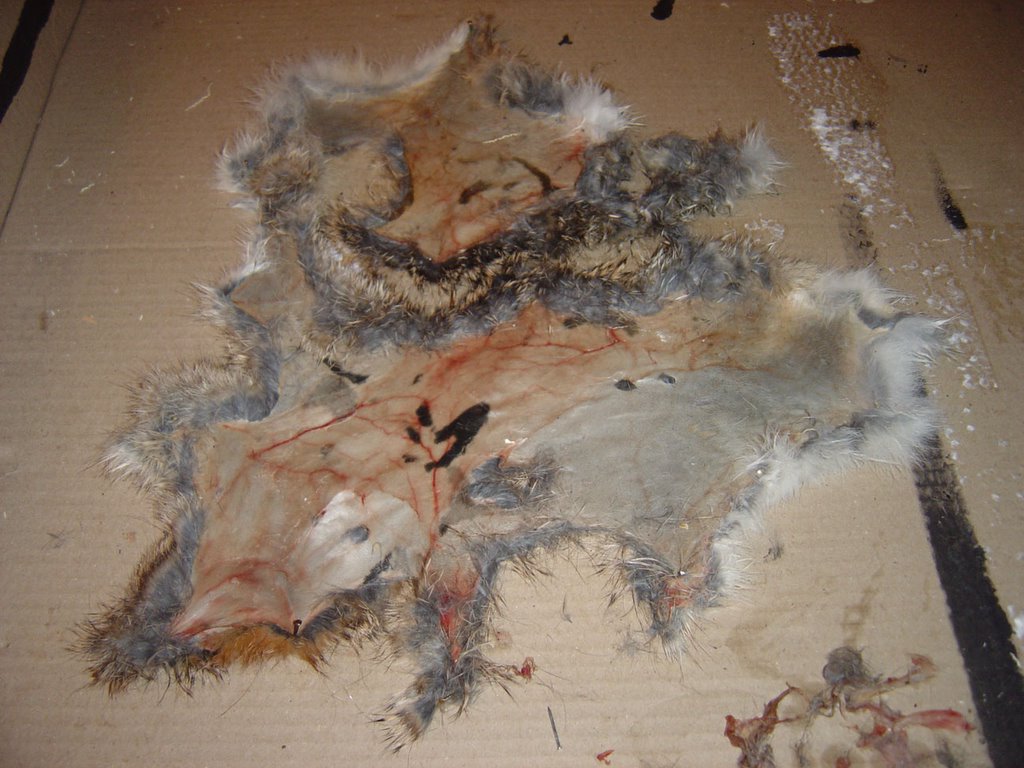
If you haven't read Part 1 of this series, you can read it here. Sunday night I finished the Nutria tanning project I started at the end of November. At the end of Part 1 I set the racked nutria by the wood stove to dry. Over the course of a few nights there, it dried out. One weekend my friend Andrew and I decided to work on our hides together. He obtained an animal from the same source. His was much larger than mine as you'll see in the picture below.

I used the same metal scraper my brother and I used on the bison. It was pretty easy except the details of head. Half of the time was spent carefully scraping around the ears, eyes, nose and lips.


Andrew did an open skinning and used obsidian to scrape. He tanned it and laid it out in the sun and then never saw it again. I guess someone walking by took it.


Saturday I began the long process of tanning. I used a mixture of soap, oil and water. I rubbed it in till it started getting soft. Then I poured on more mixture and folded the trash bag over top and let it saturate for several hours. When I came back it was fully saturated and flexible.


I started a fire in the wood stove to warm the air. I popped in the new Wolverine movie and settled in for many hours of stretching and drying the hide. I wrung out as much moisture as I could. Then I pulled it back and forth over a rounded post stretching all parts of the hide. Wolverine ended. I put in Watchmen and continued. The skin changed from blue to white meaning it was getting drier. Two and half hours later when Watchmen was winding down, the hide was basically dry but still felt a little cool to the touch. I continued to work the hide as I watched The Ladies Man although it was basically done at that point. The next morning the belly was soft and flexible as can be. The back was just the slightest bit stiff. Overall I was very pleased. I think the lesson was to wring it out more and towel off the fur side before stretching.

The next day I buffed the hide with a pumice stone to soften it up and get rid of skin fragments. In the picture below the right side has been buffed.


Sunday night I got out my smoker. I used to have a pail to contain the fire and support the top pail. Without that I had to rig up this monstrosity of wood and stone to support the top pail and funnel the smoke up. The efficiency of this device was pretty pathetic. 75% of the smoke probably never reached the hide. It might be hard to tell in the picture but there was a skirt of denim sewn onto the hide and connected to the duct. Using the duct prevented the flame and heat from scorching the hide.


Here you can see that the smoke was definitely reaching the hide through the duct. I later clothes-pinned the arms and mouth shut to keep the smoke inside longer. To get smoke I built up a bed of coals and then added wet wood and live evergreen branches. I had to constantly monitor it to keep it from flaming up or burning out. After an hour and a half I took it down.


The picture below shows the finished product. The picture quality isn't that great so it's hard to tell the difference between this and the pre-buffed picture earlier. But the color is definitely darker.


I'm very happy with the finished hide. The hair stayed on and it's soft and flexible enough to make a puppet out of. There were some holes to sew up and I lost the eyelashes, but other than that it's pretty nice. The only thing left to do is make something with it. Most likely I'll sew the bottom together to make some type of bag. I'll post pictures if/when I do that.

Sunday, November 22, 2009

Tanning a Nutria - Part 1

My brother came over today and brought me a gift. A dead nutria. I've wanted to tan one for awhile. My first introduction to the nutria was when my SCA crew bought a tanned hide and sewed it into a pouch as a gift for our crew leader. She loves soft, cuddly animals.

Since moving to the Portland area, I've been able to see them alive in the wild. There are at least three that I see from time to time at work. I've often mentally hunted and trapped them. They are pretty trusting around humans. The Trackers Northwest group sometimes teaches classes where they trap Nutria so I've seen hides in the tanning process. In fact, I'm told this Nutria came by way of TrackersNW.

I laid it out on the stainless steel table my brother and I bought a year ago with butchering animals in mind. No worries with blood and guts soaking into wood. It also is a high table so it's comfortable to stand around when working. It's worked for bison, deer and now nutria. I digress.

The body wasn't stiff so that made it easy to work with. The smell was only mild. Not bad.


With the bison we cut a line down the center of the belly, cuffed the legs and the neck. With the nutria I "case" skinned it instead. I still cuffed the legs, but the only other cut was around the anus (and later the tail) and connecting that to the back leg cuffs as seen in the picture below. I used two flakes of obsidian for all the cutting. One flake is at the bottom right corner of the picture.


Once I got started it was relatively easy to pull the skin over the animal until I got to the head. The head took a lot of time because of the eyes, ears and mouth. The plan is to tan the full hide including the head. In the picture below you can see the skin rolled right over the animal and is hanging on only by the tail. I ended up cutting the tail skin off completely because it didn't want to come off the body.


The last step was to fashion a stretching board. I used an old shelf and shaped it to fit the animal. Now I will let it dry out. The next step after drying will be to scrape all the meat, skin and other parts off. Sitting by the wood stove this guy should dry out faster than the bison.


I decided that I wasn't going to eat the meat because I didn't know how long it had been dead and exactly where it came from. My brother wanted to keep the bones though so I did get some practice gutting. It was a piece of cake compared to a bison.

Read Part 2 here.

Wednesday, June 03, 2009

Bison Hide Tanning Part 2

Two weeks ago my brother and I made our first attempt at tanning the bison hide. We were given access to the TrackersNW facility so we were able to move the project from our apartment to a more adequate setting. We started Friday evening by cleaning the hair with shampoo and conditioner. As recommended on the bottle, we rinsed and repeated (about 8 times). When we finished we left it to dry overnight.


Saturday afternoon we took a short kayaking trip on which I capsized and got my brother's camera a little wet. As a result I wasn't able to get pictures of the tanning process which is a shame because they would have been good. Luckily, the camera is fine. After the trip we returned to the hide to apply the dressing. We mixed up soap, neat's foot oil and the bison's brain (a traditional tanning dressing) and spread it on the hide to soak in. We used a softening stick we made to push the dressing into the hide. A softening stick has a wide flat end so you can massage the hide with more surface area. We left the dressing on the hide overnight to give it more time to saturate.

Sunday morning we started the drying and stretching process. This is usually the most tedious part of the process because you have to continually stretch the hide until it is completely dry lest it become stiff. This can take many hours. The sheer size of the bison hide made this especially difficult. Luckily the weather was warm and we had sunlight to help speed up the process. We started by leaning the frame up against a tree. At this point the hide was still dripping with the dressing. We used the softening sticks we made to stretch the hide.

We were happy with how quickly the surface seemed to dry out. The hide got really stretchy and it took a lot of force to give it a full stretch. Eventually we laid the frame on 5 gallon buckets like a trampoline and used our body weight to fully stretch the hide. This is where it would have been nice to have some pictures. :( We took turns walking around on the hide. The hide stretched so much in the middle that it touched the ground and we had to raise the frame higher with some wood risers. We also rubbed it with pumice stones to soften it.

As the day wore on we realized that while the middle was fairly soft and stretchy, the sides were rather stiff. We decided to call it a day. We took it off the frame. The next morning the middle was still pretty soft. The rest was pliable, but still pretty stiff. For example, you could wrap it around you if you had to but you couldn't make clothes out of it. So that is the current state. We may try to tan it again, but we are afraid it might start to fall apart. We already lost some hair and put a few more holes in it while stretching it.

There are a few reasons why I think the sides may have been stiff. First, we may not have had enough dressing. When we left it overnight it settled in the center of the hide. Second, it was harder to stretch the sides because they are closer to the frame. On a trampoline the middle is where you get the most bounce. Next time I think we need to make sure the sides get saturated with dressing. Maybe we can loosen the hide in the frame so we can stretch the sides more.

Tuesday, May 19, 2009

Bison Hide Tanning Part 1

My brother and I might be the only people ever to try to tan a bison hide in a two bedroom apartment. It's quite ridiculous if you think about it. It's one of the more messy and stinky projects one can work on indoors. We started with a raw bison hide fresh from the butchering class. The fur side had a lot of dirt balls, poo and other natural materials matted into it. The flesh side had meat, fat and membrane to remove. All together it produced quite an aroma.

Our first goal was to clean the fur so we wouldn't get mud and poo everywhere. It was not an easy task because we didn't have a convenient way to clean it outdoors. The bathtub was the option we choose. It took many, many rinsings before the water was not black with filth.


We soaked it in the tub for a couple days and started to become concerned that it would start rotting. My brother actually managed to take a shower with the thing. We got the fur about 80% clean and then propped it up to dry it. It was a heavy son of a gun with the fur saturated in water.


After wringing out the hair, we laid it out in the living room inside a frame. Andrew made the frame with some 2 by 6s about 8ft by 8ft. We laid out a bunch of blankets and plastic wrap underneath to not destroy the carpet.

Notice how dirty the flesh side is at this point. The white sections are places where we cut off meat and fat.


We used a heavy duty hole punch to make holes around the perimeter of the hide. Then we used little S hooks for stringing it up. These really made it easy. Without them we would have had to run the rope through each hole which is a pain. Also with the hooks it was a lot easier to adjust the set up which we did a few times.


After framing it we set it up against the wall. You may notice that the hide is really bigger than the frame. After a couple days we ended up cutting a few square feet of the hide off and restringing the whole thing. Otherwise the saggy parts like the top would have taken a long time to dry out.


For a few days the hide was still wet enough to use a wet scraping tool. In the picture, Andrew is using a sharpened bone.


As the hide dried out, we used a sharper metal scraping tool. We had to resharpen it many times to complete the scraping.

The red bowl is filled with hide scraping that we used to make hide glue.


To completely dry out the hide it took about two weeks. We had a couple fans running 24/7. In this final picture you can see how the hide was trimmed down in size. At this point most of the scraping was finished.


So far it's been an interesting project. Its progress could best be measured by the smell. The farther along we got, the less stinky it became. It was definitely pretty awful for the first week. At this point we have completed the scraping and thinning. While this was a lot of work, the hard parts still remain. Next we will finish washing the hair. Then we'll soak it, soften it and smoke it. I'll post the results of those steps in Part 2.

Wednesday, January 16, 2008

Activities Since December

It's been awhile since my last post. I've been on two more hitches since then and tomorrow I will start my next one near Yuma, CA. I also got to spend two full weeks back in Muncie, IN for winter break. While there I got to do some bow shooting with my brother, cousin and her husband. We found an old basketball and used it to do moving target shooting. It was fun.

While there I also continued tanning the deer hide I started back in March of last year. After saturating the skin in egg yolk for a day I began to dry it. First I rang it out to get as much moisture out as possible. In the picture below I'm stretching the skin as it dries out.

Stretching the skin


The skin has to be stretched until it is completely dry so that it does not become stiff. To speed the drying process I used a fan to blow hot air from the space heater onto the skin.

The skin ended up drying too fast and became stiff in parts. I bagged it up and took it back to California. While back here in California I soaked the skin and did the drying and stretching process again. This time the skin was mostly softer but still somewhat stiff in areas.

I haven't decided if I will soak and dry it for a third time or just smoke it.

The skin starting to dry


A bunch of the SCA folks spent a day and night in Joshua Tree National Park last week. We had a good time rock climbing. Below is a montage of one of the cooler boulders I climbed. The following day a few of us drove and hiked to a hot spring in the San Bernadino National Forest. It was beautiful soaking in a natural hot tub in the desert next to a creek.

Climbing montage


I've started working on a few other projects I hope to post about in the future. For one project Rosy and I collected clay and hope to fire some pots in our backyard. Four of us are also going to make moccasins soon. We received a nice piece of buffalo skin in the mail today for the soles.

Monday, March 26, 2007

Deer Hide

Last weekend I started tanning my first deer hide. I soaked the hide in a bucket of water and wood ash for about a week to get the hair and grain to come off more easily. The picture below is what it looked like when I started to scrape off the hair.


After I scraped the hair and grain off, I then flipped it over and scraped of the mucous layer. The hide had a lot of holes near the edges so rather than spend time scraping these areas, I just trimmed them off. The picture below shows the hide after scraping both sides. There is still some grain left that I'll try to scrape off. After that the next step will be to brain it.


I had to put the hide in the freezer because I don't have enough time to work on it now. I'm getting ready to sell my house so I may be posting less frequently for awhile.

Tuesday, January 02, 2007

Holiday Time

I had a great holiday with my family despite catching a cold. I ended my 2-year streak without sickness. :( My brother and I took our niece and nephew out shooting one day. He made a kid's bow a couple years ago that they both shared. It was pretty cool teaching them the proper technique.


Madeline picked it up pretty well and was able to shoot a couple arrows 30+ yards which is probably close to the bow's max range.


On our little journey we took them by a patch of cattails. Over Thanksgiving we took our nieces Natasha and Brianna by the same spot. The game is to grab the sausage head of the cattail and throw it at someone. The closer you are the better because it explodes into a cloud of fluffy seeds once you release it. By the time we were done, we had seeds all over our clothes. It's also a good way to reseed the area.


A few days after Christmas we went out shooting again. This time we took some of our friends. We had both a long and short distance shoot. The short distance shoot is pretty fun. The idea is to shoot at full draw straight up and see how close to you you can land the arrow. Part of the fun is that it is dangerous and stupid to do, but we've never had an arrow land closer than 15 yards so we're not too worried about it. As long as you keep your eye on the arrow, you're safe.

Here is my friend Steve shooting with my roommate Derik looking on.


My brother got me a Nicholson rasp for Christmas. He made the beautiful handle himself out of Osage. It's a little crooked, but it doesn't affect the performance negatively. This rasp is many times better than the one I was using before. I've been using it on the new bow I've been working on which I'll be writing about soon.


He also gave me two deer hides to tan. This is great because I've never tanned a hide before and have been wanting to learn for a long time. Chances are I won't get to them till the Spring when it is nice out, but you never know with global warming it may be nice out all winter.

I'd also like to acknowledge that I've been blogging now for over a year. I'm happy I started documenting my projects. I hope to keep it up as I delve into more skills.

Tuesday, January 03, 2006

Christmas Time Skills

I had a great Christmas break. Because the weather was so nice I got to spend a lot of time outdoors. My brother made me a new bow from Osage Orange wood.
It is quite an awesome gift. With two bows my good friend Jon and I spent 2+ hours shooting together. It was a blast.

I also had some time to do some tracking around the area. I found a heavily used dear trail. Right before the trail exited into open area, I found a kill. I determined it to be a rabbit on account of finding the cottontail at the kill site. There was also a big patch of torn off skin left behind. Little did I know at the time that this was a foreshadowing of what was to come on Christmas day. I looked for a long time on several trails but I could not find any tracks besides deer. In the end I had to assume that the predator was a coyote. I know they are in the area and my mom said she heard one a few nights before.

On my way to church Christmas morning, there was a roadkill rabbit a few houses down the road from my parents' house. It was easy to tell that the kill happened that morning. After church I picked it up. Last night I skinned it. The skin is so thin that I ripped it in several places. I'm not sure if I'll be able to finish tanning it.

As you can see, I wasn't able to get all the fat off of it yet.

Stay tuned. My next post will be an update of the progress of my bow.