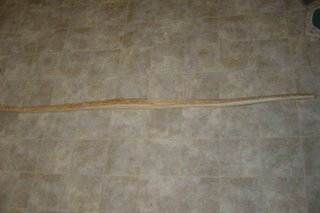
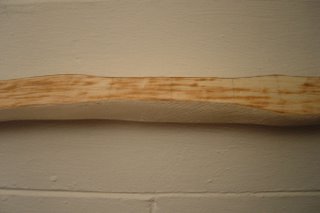
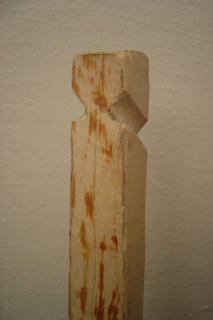
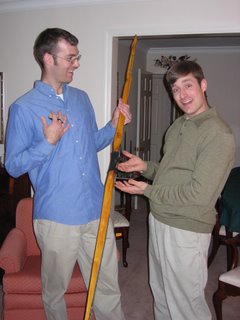
Disaster struck tonight! All my hard work down the drain! It's over. Finished. My bow is broken.
I was tillering my bow getting it pretty close to the point where I would write my next post about it. I put it on the tillering stick and glanced over at my tv because it was a good part of the movie Tron. Blamo! It blew up and scared the shit out of me.
I know what the problem was. This limb was twisted about 45 degrees. Based on the way it fractured, I can tell that the twist was the cause. So I guess my bowmaking series will have to wait till I start my next bow. It isn't a total loss. I can use the other limb to make an atlatl or a firebow. An atlatl is basically an extension of the human arm to get extra leverage for throwing big darts. A firebow is used for making bow drill fires.
"You know, like numchuck skills, bow hunting skills, computer hacking skills. Girls only want boyfriends who have great skills."
--Napolean Dynamite
The main purpose of this blog is for me to document and share my practicing of skills. While, I won't be practicing numchuck skills or computer hacking skills, I am practicing bowhunting skills and a slew of other survival skills. I may have posts about other things as well though.
Tuesday, January 31, 2006
Monday, January 30, 2006
Michigan Weekend
This weekend I went to Michigan. I was able to kill two birds with one stone by hanging out with my homeboy Steve in Ann Arbor at night and going to the "Traditional Bowhunters Expo East" in Kalamazoo during the day. I hung at Steve's apartment with his friends. Here are some pictures of Steve's crew. As you can see it is was regular U.N. summit.
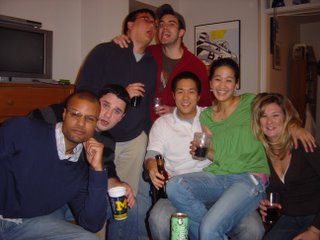
Steve is seen here in red.
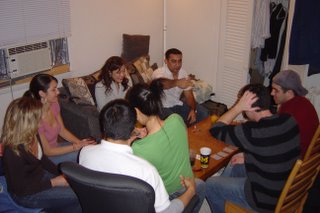
Saturday I drove to Kalamazoo to the convention. There were probably 400 or more people there. The average person there was a fortysome year old man with a close trimmed beard and a camo baseball hat on. It wasn't really a redneck feel, just an outdoorsman feel. I went to a couple seminars. The most interesting one was about a bowhunter who is blind. He prefers this terminology than a blind bowhunter. He and his sighter were a couple of cut ups. They have been shooting together for longer than I've been alive. They basically just told stories about there hunting trips together and then showed how the shooting works.
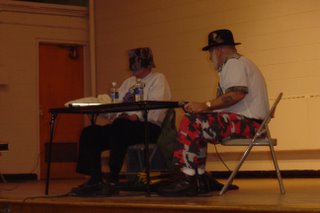
As you can see they like to joke around. This was Lenny showing how he camos up for the shoot.
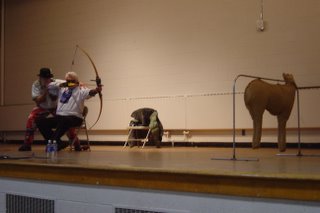
Here they demonstrated how John sights the target. Obviously this is pretty short range, but typically they shoot around 20-30 yrds or longer. They are both archery champions.
At the convention there were tons of tables full of stuff people were selling. I probably spent over $150 on all kinds of stuff. Most of the stuff I bought was for making arrows. I got a fletching tool, a tapering tool, feathers, arrow points and shafts. I also got some things for making arrow points and other stone tools. Right now I'm really more excited about that, but I have to wait till the weather is nicer before I can work on it.
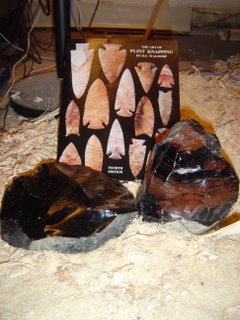
The rocks are both obsidian and together cost about $25. Obsidian is one of the easiest rocks to work with. A neat thing about it is that it fractures to the very molecule which is 1000 times sharper than a surgical scalpel. You can expect some posts about this in the future.
Tuesday, January 24, 2006
Skill: Nail Arrow
Alright, so you heard me gripe about breaking arrows. Tonight I repaired one of them. Here's the story. Two days ago I was reading a book of mine called "Making Indian Bows And Arrows The Old Way" when I saw a picture of an arrow that had a nail as its tip. I thought it was pretty dope so I decided to make one with one of my busted arrows.
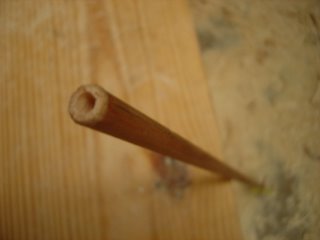
It was actually very simple. The first thing I did was drill a whole in the shaft.
Sorry for the out of focus picture.
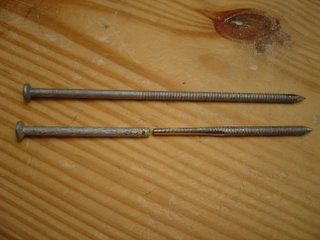
After that, I prepared the nail by sawing it in half and filing down the non-pointy side so it would fit into the hole.
On top is an original nail and the bottom right is the finished tip.
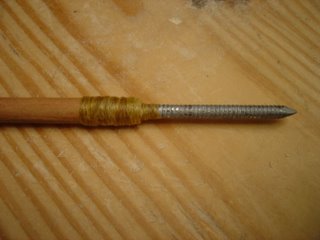
Then I inserted the nail and wrapped it all up with artificial sinew. This will keep the nail from splitting the shaft or coming out. The last thing I did was put some beeswax over the sinew to keep it from unraveling.
I shot the arrow a couple times and it is pretty nice. It is definitely heavier at the tip then a normal hollow tip. I'm not sure yet how the arrow will handle on a longer distance shot. I'll probably make some more of these at a shorter length. Shooting it is kind of like shooting a nail gun, except this baby can go about 200 yards.
My bow is still coming along. I'll probably have another post about that soon.
Monday, January 23, 2006
Mystery Track 1
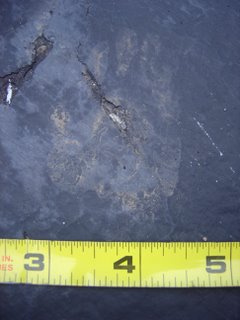
After a rain a week ago I saw a lot of mud tracks on my driveway. I used the opportunity to take some pictures. I'm hoping this will be the start of a series where you my loyal readers get to guess what animal made the track. I didn't get all the track and trail measurements, but this one should be pretty easy.
Here is the trail.
Here is a rear track.
Post a comment on what type of animal made this track. I'll post the answer later.
Here is the trail.
Here is a rear track.
Post a comment on what type of animal made this track. I'll post the answer later.
Tuesday, January 17, 2006
What's New
I haven't spent too much time on skills the last week other than shooting. I try to shoot anytime it is light out and the temperature is in the 50s. I don't mind light rain as long as it is warm. It seems like every time I got out to shoot I come back with fewer and fewer shootable arrows. I've got broken nocks, pulled off tips, and unglued fletching, but most of all it is broken shafts. I've worn out shafts more than Isaac Hayes.
I didn't get to work on anything this weekend because I was playing volleyball at IU. My alumni team got together to play a match against the current club team. It was great because we beat them despite all the goofing around we did. The volleyball wasn't really the main focus of the weekend. It was really an excuse to get together and party. We went out to bars both Friday and Saturday night. I wish I had pictures to show you, but I didn't have my camera with me. If I come by some I'll post them.
Monday, January 09, 2006
Skill: Bowmaking Part 2
I'm back with an update of my bow. If you haven't been following along, you should check out the previous two bowmaking posts here and here. It's coming along nicely. It actually looks like a bow now that I've trimmed it down to shape.
To get to this point I used the draw knife as much as possible since it can remove a lot of wood quickly. I got into some trouble along the way with the wood splitting and peeling. When this started happening I switched to a rasp as seen below.
This tool makes it pretty hard to make a mistake since it doesn't really allow you to split the wood or dig in like a draw knife. It also takes off less wood at a time of course.
So coming into this post, I basically have the back of the bow complete. Right now I'm working on getting the sides finished. That will leave just one variable, the belly, to remove wood from when I'm tillering the bow. Below you can see a more detailed view of my handle section.
There is more work to be done on it but you can see the sides are looking pretty good. The final thing to do before tillering, besides making a string is to cut some nocks into the tips.
For this, I used some smaller round files not pictured. My next bowmaking post will discuss tillering, which is the process of removing wood from the belly to even out the bend of the limbs.
Tuesday, January 03, 2006
Christmas Time Skills
I had a great Christmas break. Because the weather was so nice I got to spend a lot of time outdoors. My brother made me a new bow from Osage Orange wood.
It is quite an awesome gift. With two bows my good friend Jon and I spent 2+ hours shooting together. It was a blast.
I also had some time to do some tracking around the area. I found a heavily used dear trail. Right before the trail exited into open area, I found a kill. I determined it to be a rabbit on account of finding the cottontail at the kill site. There was also a big patch of torn off skin left behind. Little did I know at the time that this was a foreshadowing of what was to come on Christmas day. I looked for a long time on several trails but I could not find any tracks besides deer. In the end I had to assume that the predator was a coyote. I know they are in the area and my mom said she heard one a few nights before.
On my way to church Christmas morning, there was a roadkill rabbit a few houses down the road from my parents' house. It was easy to tell that the kill happened that morning. After church I picked it up. Last night I skinned it. The skin is so thin that I ripped it in several places. I'm not sure if I'll be able to finish tanning it.
Stay tuned. My next post will be an update of the progress of my bow.